Draw a River Step by Step

Click HERE to save the tutorial to Pinterest!
A river is a flowing body of water. Rivers of different sizes go by many names – stream, creek, brook, rivulet, rill, run, burn, and beck, to name a few. Rivers often begin in mountainous areas and flow into larger bodies of water, such as lakes or seas. Some of the most famous rivers in the world include the Nile River in Egypt, on the African continent; the Mississippi River in the United States, North America; and the Amazon River in Brazil, South America.
Rivers are vital to life because they provide an ample supply of fresh water. Since antiquity, settlements and cities often sprang up near rivers. Rivers were also sources of food, including fish. Ancient mythologies often included river gods and goddesses, who were called upon in times of drought.
Scroll down for a downloadable PDF of this tutorial.
Rivers also play a role in modern culture. Many aspects of life can be compared to a river. For example, the song "The Rose" opens with the words "Some say love, it is a river, that drowns the tender reed." In the Disney film Pocahontas (1995), a bend in the river is used to represent the unknown future and major decisions to be faced in the song "Just Around the River Bend."
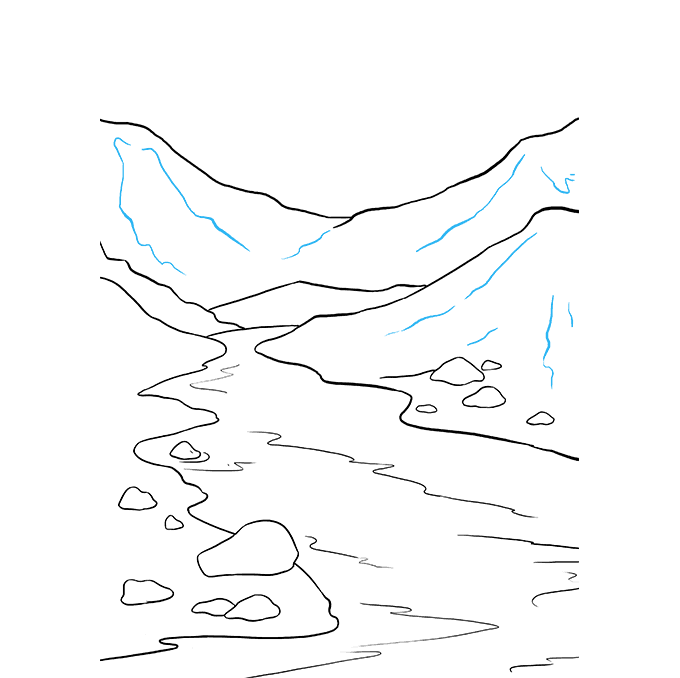
Would you like to draw a landscape featuring a flowing river? Doing so is easier than ever with the help of this simple, step-by-step drawing tutorial. All you will need is a pencil and a sheet of paper. You may also wish to employ crayons, markers, colored pencils, or paints to shade your finished drawing.
In each step of this drawing guide, you will be given both an illustration and explanatory text. Pay special attention to the highlighted blue lines in each illustration; these indicate new lines to be added to your drawing.
If you liked this tutorial, see also the following drawing guides: Snowflake, Moon, and Rain.
Step-by-Step Instructions for Drawing a River

1. To begin, outline one side of the riverbank. Enclose a shape along one side of the paper using a long, curved line. Note how the shape peaks at the top, indicating a hill or mountain.

2. Draw the riverbank on the opposite side. Again, enclose an irregular shape along the edge of the drawing using a long, curved line.

3. Detail the riverbank with rocks of various sizes. For each rock, enclose an irregular shape using a curved line. Also, draw a curved line between the two sides of the riverbank, indicating the river's distant horizon.

4. Add the detail of rocks to the opposite riverbank. For each rock, enclose an irregular shape using a curved line. Draw some rocks larger than others.

5. Begin to draw the mountains in the background. To do this, draw a curved, bumpy line from the edge of your drawing to the river's horizon, parallel to the slope of the hill drawn previously.

6. Draw a curved line across the top of the sketch, following the curve of the hills already drawn. This indicates the mountain range in the distance.

7. Give life to your river by adding rippling details of flowing water. To do this, draw curved and wavy lines of various sizes along the length of the river. Note how curved lines are also drawn in a circular pattern around rocks located in the water.

8. Draw another small mountain straddling the river's horizon, using a curved line.

9. Add texture to the mountains. Draw jagged, curved lines extending diagonally down the mountains' slopes.

10. Color your river landscape. Will you draw purple mountain majesties, barren brown or grey Rockies, or misty green Smokey Mountains? Perhaps you prefer snow covered Alps. Be creative, because the choice is yours.
Scroll down for a downloadable PDF of this tutorial.
Printable Drawing Tutorial
MEMBER TROUBLESHOOTING
Still seeing ads or not being able to download the PDF?
First, check that you're logged in. You can log in on the member login page.
If you're still not able to download the PDF, the likely solution is to reload the page.
You can do this by clicking the browser reload button.
It is a circular arrow-shaped icon at the top of the browser window, typically found in the upper-left side (you can also use keyboard shortcuts: Ctrl+R on PC and Command+R on Mac).
Source: https://easydrawingguides.com/how-to-draw-a-river-really-easy-drawing-tutorial/


